


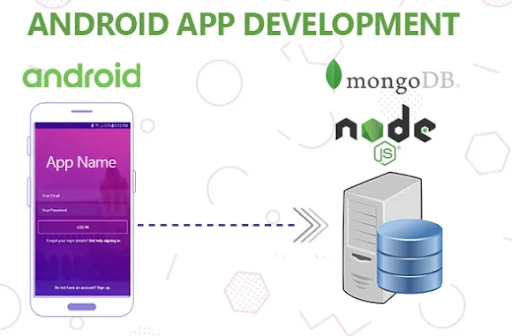
You can create an Android app if you know how to create websites. Android JS takes your Node JS website and puts it into a WebView.
There are many difficulties in working with Android JS, but with various APIs, the interaction becomes much simple. An android.js application can do much more than communicate with a WebView like the front end of a website; it can also interface with the backend, files, and a lot more!

The “Node.js + Android App” is growing in popularity as a result of Node.js’ outstanding performance in recent years. Of course, PHP, which is almost 25 years old and has a lot of useful frameworks, is more reliable than Node.
However, Node.js is actively evolving, has excellent performance indicators, and sometimes outperforms PHP. Nevertheless, performing tasks like API queries is where Node.js shines. So, how about building an android app on Node JS with Android JS? Sounds interesting? Then let’s get into it!
Android JS explained


Android JS is the OS framework that was created & maintained on GitHub. It’s possible to create Android applications using the front & back-end elements of the Node.js runtime and Android Webview, which were originally developed for web applications.
Android apps utilizing frontend technologies like JavaScript, HTML, and CSS can be created using the Android JS framework. But how is it any different? In many ways! You can utilize any NPM package in your project because Android JS has a Node JS runtime environment. The back Process and Front Process are two processes offered by Android JS.
The front process is simply your app’s views, which you may create using HTML/CSS, Angular, Phonon Framework, Onsen UI, Vue & more. On the other hand, the main process of your app that interacts with the Node environment is called the Back Process
Android JS offers IPC (Inter Process Communication) to facilitate communication between the Back and Front processes. Numerous native android libraries, such as notification, toast, call, and SMS, are provided by Android JS.
Additionally, Android JS offers browser libraries such as the Camera API and the Microphone API. Since we got a basic idea about Android JS, let’s start leveraging it to build android apps with Node JS.
Getting started with Android JS+ Node JS to build apps
Here’s what you must bear in mind if you want to build an application on Node JS through the Android JS platform.


Requirements
Before we get started, we need to fulfill the basic Android JS requirements. It includes the installation of NodeJS, npm, and JDK 1.8 or above. You can install and switch between Node.js and npm using node version managers, enabling you to test your applications on various npm versions to ensure they function properly for users of various npm versions.
Using a Node installer is not advised since it installs npm in a directory with local permissions, which may result in permissions errors when npm packages are run globally.
Installation
To install Android JS binaries, you can use npm.
![]()

Once the requirements are fulfilled, it’s time to install Android JS. for this, you have to install the Android JS project generator and builder.
![]()

Initialization
Next is initialization. Use the code-


It will create a sample project inside the Android App directory by installing android JS and adding it to the package.json as a dependency of your app. Download the androidjs.js file, place it in the assets folder, and add it to the index.html.
That will look something like this:


- main.js: You must write all of the node js code inside of main.js since it is the main file or, to put it another way, the back end of your app executes all of the node js code.
- index.html: The first view that the app renders initially is index.html.
- package.json: To maintain all your node packages, use package.json.
- assets: to house all of your app’s assets
Building the app
Now it’s time to start building your android app. The first thing is to create the UI of your app using HTML code. It is what it will look like. Copy this code and add some functions to your index.html file to modify the author, title, and text above it.
Include these functions in the index.html file so that they can be used to save new data and retrieve previously saved data when the app opens.
Therefore, this is how we created a function called “save” that runs when a user clicks on the save button. It collects the author, title, and text and sends it to the back process to store the data and the location where it should be saved in the android device’s storage.
Upon application launch, data is requested by signal get-data, and once received via the signal get-data-result from-back procedure, data is filled into the HTML view. Next is to define your functions to handle the data in main.js. It is how you can do it.
To manage the data flowing from your front process, put these functions in your main.js file (index.html)
Developers prefer backend functions in Node JS because Android JS offers a Node JS runtime environment. Therefore, you need Android JS to access the services offered by android JS, including the fs module to save data into storage and the path module to generate paths.
Here we have created a signal called save-data that receives data and a path from the front process and saves it to the Android device’s storage under the name data.txt. The same file from storage is then read by the get-data signal, sending the information to the front process.
Also, Read – Why Should You Consider React Native App Development?
Packaging
The last thing left to do is the packaging. Before you start doing so, configure your app with:
- App Name
- Package Name
- Icon
- Android permissions
- Output Directory
Post this, and your package.json will look something like this.
Lastly, you only need to open the console and navigate to the directory for our app to bundle your application. Use the code:


To create a .apk file inside the dist folder. If the build command fails or returns an error, try building with the force command.
In the end, you can view a signed .apk under the .dist file.


Final Thoughts:
If you are unfamiliar with other frameworks, Android.js is a fantastic option. But at least you can use Android JS to produce an API that will run on a device much like an Android application using your current code. So, for that purpose, you can hire remote programmers who will help and really boils down to your comfort level and the requirements of your application.
In the end, if you want apps constructed using Node JS via Android JS, this is the route to accomplish such!